How to Restick Your Cricut Mat (Safely & Effectively)
Is your Cricut mat losing its tack? Don’t toss it yet! In this friendly, step-by-step guide, you’ll learn how to clean and safely “restick” your mat so it grabs materials again—without turning it into a lint magnet. We’ll cover what supplies you need, the right method for different mat types (LightGrip, StandardGrip, StrongGrip), common mistakes to avoid, and maintenance tips to keep your mat working longer.
Quick answer: Wash with mild soap, rinse, dry lint-free, then (optionally) refresh tack with a light, even coat of repositionable adhesive—never permanent glue—keeping the grid border masked off.
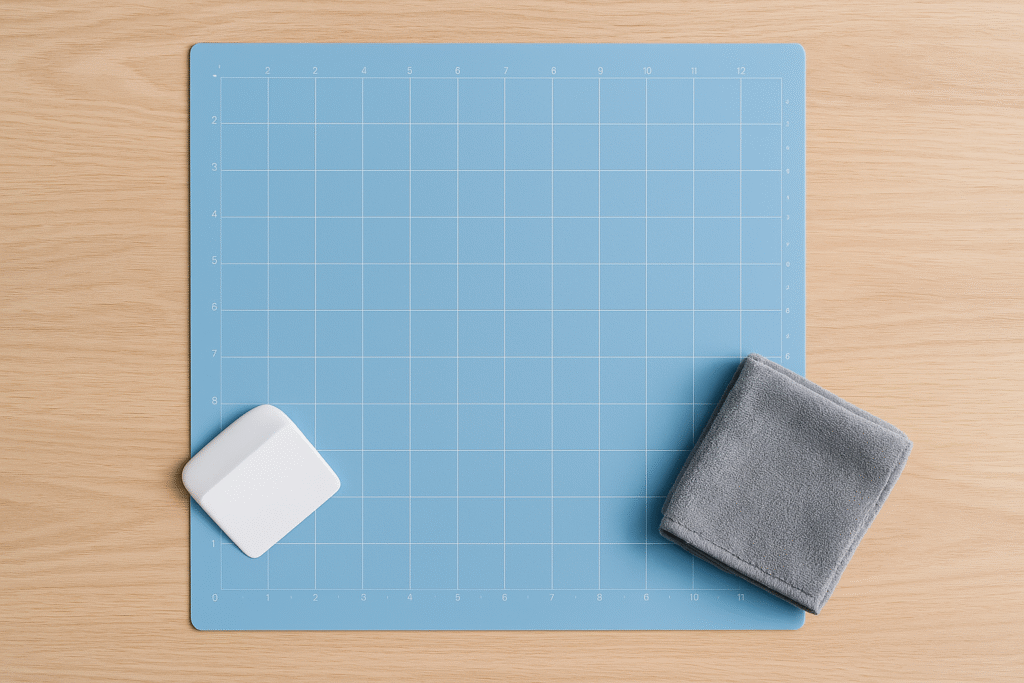
What You’ll Need
- Mild dish soap and warm water
- Plastic scraper or an old store card
- Microfiber cloth (lint-free)
- Painter’s tape or masking tape (to protect the border)
- Optional: repositionable spray adhesive (NOT permanent)
- Optional: brayer (helps even contact)
- Optional: lint roller
Not sure which mat to use for which material? See the Cricut Help Center (https://help.cricut.com/) for general guidance.
Important Safety Notes
- Ventilation: If you use spray adhesive, work in a well-ventilated area—ideally outdoors or near an open window.
- Protect the grid border: Cover the non-sticky border with painter’s tape so it stays clean and your machine rollers don’t get tacky.
- Repositionable only: Choose a repositionable adhesive (often labelled “repositionable” or “removable”). Avoid permanent sprays or liquid glues.
- Light, even coats: More isn’t better. A light coat prevents lumps and over-tackiness.
For general spray-adhesive safety in the UK, check HSE guidance (https://www.hse.gov.uk/coshh/)
Step-by-Step: Clean & Restick Your Mat
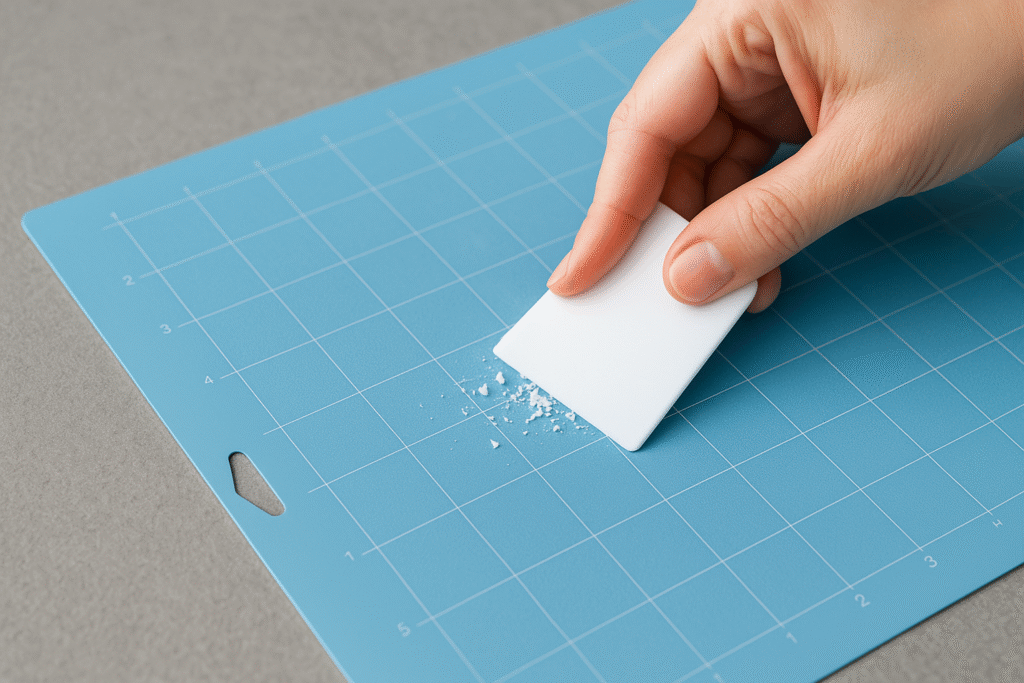
Step 1: Remove big debris
Use your plastic scraper or an old bank/store card to gently lift off paper fibres, tiny vinyl bits, and stray threads. Be gentle—don’t gouge the surface.
Step 2: Wash with mild soap
Run the mat under lukewarm water. Add a drop of mild dish soap and use your fingers to massage the surface in circles. Avoid scouring pads—your mat’s adhesive layer is delicate.
Step 3: Rinse & dry (lint-free)
Rinse thoroughly, then pat dry with a microfiber cloth. Let the mat air-dry completely. If lint sneaks in, use a lint roller very lightly once the mat is dry.

Step 4 (Optional): Mask the border
Run painter’s tape along the outer border and any measurement marks. This keeps adhesive off areas that must remain clean for smooth feeding.
Step 5 (Optional): Light coat of repositionable adhesive
Hold the can 8–12 inches away and spray a light, even coat across the work area only. Avoid puddles or heavy patches. One pass is usually enough.
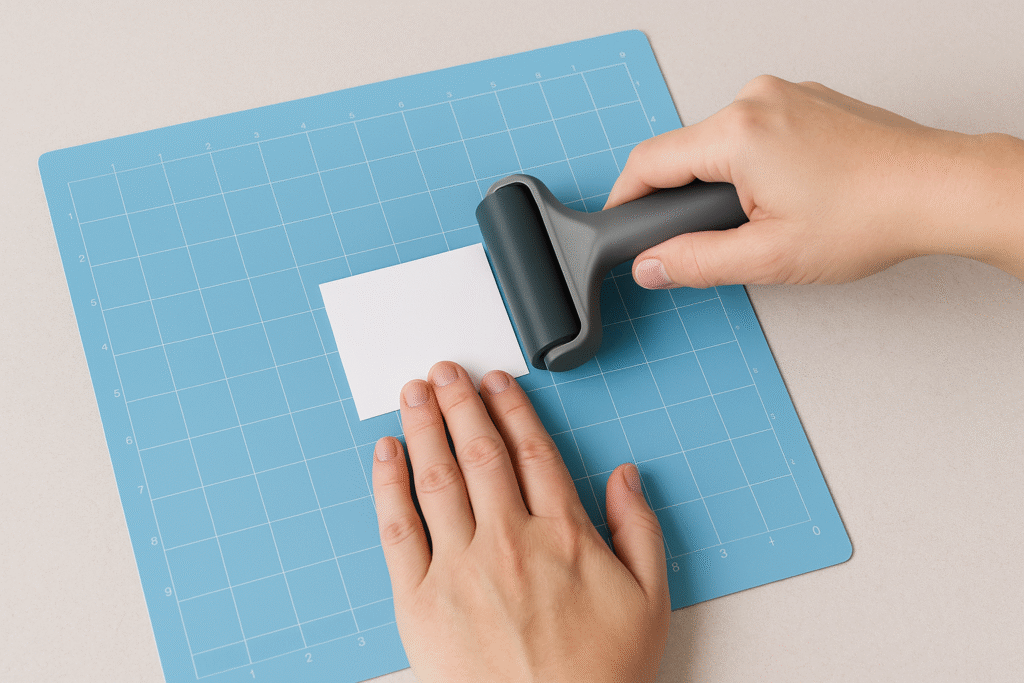
Step 6: Cure & test
Let the adhesive flash off per the can’s directions (usually a few minutes). Remove the tape. Use a brayer to apply a scrap piece of cardstock; if it grips and releases cleanly, you’re ready to craft.
Troubleshooting & Common Mistakes
- Still not sticky? Wash again, dry fully, then try a very light adhesive coat. Uneven or heavy spray often performs worse than a thin, even pass.
- Too sticky—paper tears: Tap the mat with a clean T-shirt to reduce tack slightly, or use a LightGrip mat for delicate papers.
- Streaky grip: You may have sprayed unevenly or too close. Clean, re-mask, and apply a lighter, more even coat.
- Edges catching in the machine: Check that the border is clean and adhesive-free. If the edges are curling, store your mat under a flat, heavy book overnight.
How to Make Your Mat Last Longer
- Cover it: Always put the protective film back on when you’re done.
- Use the right mat: LightGrip (blue) for paper, StandardGrip (green) for most vinyl/cardstock, StrongGrip (purple) for heavier materials.
- De-lint often: A quick pass with a lint roller after papercrafts helps a lot.
- Rotate your mat: Load from the opposite edge now and then to spread wear.
- Go gentle: Avoid hard scrubbing tools; they can damage the adhesive layer.
FAQ
Will resticking ruin my mat?
No—if you use repositionable adhesive sparingly and mask the border. Over-spraying or using permanent glue can cause issues.
How often should I restick?
It depends on your materials. Paper sheds more than vinyl, so papercrafters may restick more often. If you clean lightly after sessions, you’ll restick less.
Can I restick any brand of mat?
Most craft cutting mats have a similar structure, but thickness and coatings vary. Always test on a small area first and check the manufacturer’s guidance.
What if I only want to clean, not restick?
That’s fine! Many times a good wash and dry brings back enough tack for light materials.
Download this file then check it's Cricut-ready with SVG Doctor before you cut — it scans for stray nodes, layer issues, and anything that might cause problems in Design Space.
Check My SVG Free →
[…] Your Cricut machine + standard grip mat […]