How to Make Stickers with Cricut: The Complete Guide
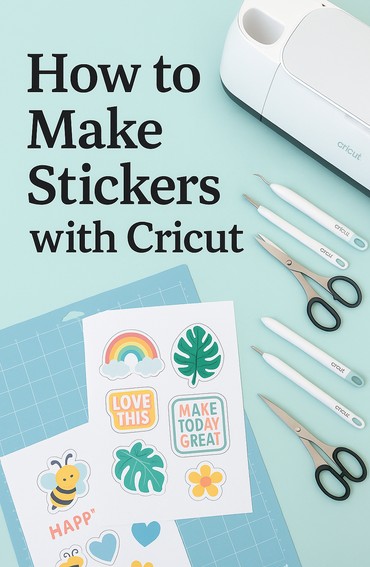
If you’ve ever wanted to create personalized stickers for planners, scrapbooks, small businesses, or just for fun, a Cricut machine is one of the best tools to get professional results at home. Stickers are fun, versatile, and surprisingly easy to make once you know the process. In this guide, we’ll walk you step-by-step through everything you need to know about how to make stickers with Cricut, from design to print to cut.
Why Make Stickers with Cricut?
Stickers have exploded in popularity thanks to planners, journaling, custom packaging, and Etsy shops. With Cricut, you don’t need to rely on expensive printing services — you can design and cut your own stickers from start to finish. Here are a few reasons crafters love using Cricut for stickers:
- Professional quality at home – Crisp cuts, smooth edges, and perfectly matched designs.
- Unlimited creativity – Create any shape, size, or style you can imagine.
- Save money long term – Once you invest in supplies, making stickers yourself is far cheaper than ordering in bulk.
- Personalization – Add names, dates, logos, or custom graphics to make every project unique.
- Perfect for small businesses – Packaging labels, thank-you stickers, or branded decals can all be produced in-house.
What You Need to Make Stickers with Cricut
Before we jump into the steps, let’s go over the essential tools and materials.
- Cricut Machine – Both Cricut Explore and Cricut Maker models work perfectly for stickers. The Cricut Joy can cut smaller stickers too.
- Cricut Design Space – The free design software where you’ll create and set up your stickers.
- Inkjet Printer – For printing full-color sticker sheets before cutting.
- Sticker Paper – Available in matte, glossy, or clear finishes. Cricut sells its own, but many third-party options also work.
- Cutting Mat – A LightGrip (blue) mat is best for sticker paper.
- Optional: Laminating Sheets – For waterproofing or adding a glossy finish.
- Weeding Tool or Scraper – Helpful for lifting stickers from the mat.
Pro Tip: If you’re looking for ready-to-cut designs, check out Creative Fabrica They offer thousands of sticker templates, SVGs, and graphics perfect for Cricut users.
Step 1: Designing Your Stickers

The first step to make stickers with Cricut is creating your design. You have several options:
- Use Cricut Design Space
- Upload your own images (PNG or JPG with transparent backgrounds work best).
- Create text-based stickers with Cricut’s fonts.
- Use the “Shapes” feature for simple icons and outlines.
- Find Pre-Made Designs
- Many websites offer sticker graphics and SVG files.
- Creative Fabrica and Etsy have bundles of planner stickers, cartoon sets, and labels ready for Cricut.
- Design in Other Software
- Use Canva, Procreate, or Photoshop to create unique artwork.
- Save as PNG with a transparent background before uploading to Design Space.
Remember to flatten your design in Cricut Design Space if you’re doing Print Then Cut. This ensures Cricut treats it as a single print layer instead of multiple cut layers.
Step 2: Setting Up Print Then Cut

Most stickers are made using Cricut’s Print Then Cut feature. Here’s how it works:
- Arrange your designs in Design Space.
- Select all images and click Flatten.
- Choose “Print Then Cut” in the operation dropdown.
- Resize your sheet to fit Cricut’s Print Then Cut limits (6.75″ x 9.25″ for most machines).
- Click Make It to preview the layout.
Cricut will add a black registration box around your sticker sheet. This box is crucial — your printer prints it, and then your Cricut scans it to know where to cut.
Step 3: Printing Your Stickers
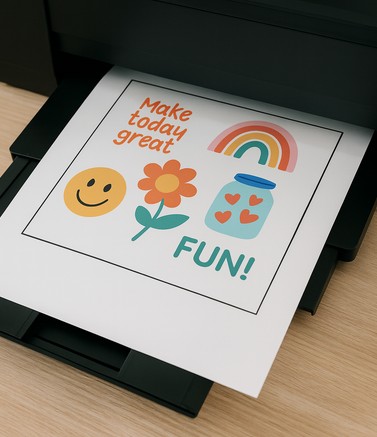
Once your sheet is ready, click Send to Printer in Design Space.
- Select your inkjet printer.
- Turn off “Add Bleed” if you don’t want color extending past the edges. (For full bleed stickers, leave it on.)
- Use “System Dialog” for advanced printer settings. Choose high quality and the correct paper type.
For the best results:
- Use glossy paper for vibrant, photo-quality stickers.
- Matte paper is easier to write on with pens and markers.
- Waterproof vinyl sticker paper works for outdoor use or water bottles.
Let your sticker sheet dry completely before loading it onto the cutting mat.
Step 4: Cutting Your Stickers with Cricut

Now it’s time for the fun part — cutting!
- Place your printed sheet on a LightGrip (blue) mat.
- Load the mat into your Cricut machine.
- In Design Space, select your material. Options include:
- Sticker Paper
- Printable Vinyl
- Or a custom setting for “Washi Sheet” if you want kiss-cut stickers.
- Your Cricut will scan the registration box and cut precisely around each design.
Kiss Cut vs Die Cut Stickers
- Kiss Cut Stickers – The Cricut blade cuts only through the top sticker layer, leaving the backing intact. Perfect for sticker sheets.
- Die Cut Stickers – Cuts all the way through, giving you individual cut-out stickers. Great for singles or packs.
You can control this by adjusting cut pressure or choosing different material settings.
Step 5: Finishing Touches
After cutting, carefully peel your sheet off the mat. For professional-looking stickers, you may want to add finishing touches:
- Lamination – Add a clear laminating sheet before cutting to make your stickers waterproof and glossy.
- Packaging – For selling stickers, create branded backer cards and place sticker sheets inside cello bags.
- Storage – Keep sticker paper in a dry place to avoid curling or ink smearing.
Tips & Tricks for Better Stickers
Here are some helpful tips to get the best results when you make stickers with Cricut:
- Calibrate Your Machine – If your Cricut is cutting slightly outside the printed lines, use the calibration option in Design Space. This fine-tunes the Print Then Cut feature so your stickers come out perfectly aligned instead of looking “off.”
- Test Cuts – Before cutting a full sheet, do a small test cut on the corner of your sticker paper. This helps you confirm whether the blade pressure is set correctly and prevents wasting an entire page if adjustments are needed.
- Use High-Quality Graphics – Low-resolution images often look fuzzy or pixelated once printed. For crisp, professional stickers, always work with designs that are at least 300 DPI to maintain sharp edges and vibrant colors.
- Save Ink – Stickers with solid colored backgrounds can quickly drain your printer cartridges. Using white or lightly patterned backgrounds not only saves ink but also speeds up printing and keeps costs lower.
- Experiment with Finishes – Don’t stick to plain white sticker paper. Holographic, clear, and glossy finishes can transform simple designs into eye-catching creations. Testing different finishes will help you discover what works best for your projects.
Fun Sticker Ideas to Try
Not sure where to start? Here are popular sticker project ideas for Cricut crafters:
- Planner Stickers – Icons, checklists, and decorative elements.
- Business Stickers – Logo labels, thank-you stickers, and packaging seals.
- Kids Stickers – Cartoon characters, reward stars, and fun badges.
- Holiday Stickers – Seasonal designs for Christmas, Halloween, or Valentine’s Day.
- Quote Stickers – Inspirational sayings or funny phrases.
- Custom Photo Stickers – Print family photos or pet portraits as stickers.
Troubleshooting Common Issues
Even experienced crafters run into problems when learning how to make stickers with Cricut. Here’s how to solve the most common issues:
- Cuts Not Lining Up – Recalibrate your machine, and make sure your mat is loaded straight.
- Paper Jams in Printer – Use the correct paper size and make sure sticker paper is compatible with inkjet printers.
- Ink Smudges – Allow the sheet to dry completely before handling or cutting.
- Sticker Paper Curling – Store sheets flat in a cool, dry place.
- Blade Cutting Too Deep – Use less pressure or switch to “Washi Sheet” setting for kiss cuts.
Selling Your Stickers
Many Cricut users start making stickers for personal use but soon discover a business opportunity. Stickers are small, lightweight, and ship easily, making them perfect for online shops.

- Etsy is a popular marketplace for handmade stickers.
- Craft fairs allow you to sell sticker packs locally.
- Social media like Instagram and TikTok are great for showcasing your designs.
Make sure you understand copyright laws — only sell designs you own or have a commercial license for. Sites like Creative Fabrica offer commercial-use designs that are safe for small businesses.
Frequently Asked Questions
Can I use Cricut Joy to make stickers?
Yes, you can use Cricut Joy to make stickers, but there are some limitations. Unlike the Cricut Explore or Maker series, the Joy doesn’t have the Print Then Cut feature, which is the easiest way to make full-color stickers. Instead, you’ll need to print your designs separately and then cut them manually using the Joy app. You can also create simple shape stickers or layered vinyl decals. While it’s not as versatile as larger Cricut machines, it still works well for basic labels, planner icons, and smaller projects.
Do I need a special printer?
No — a regular inkjet printer works great for making stickers with Cricut. Most sticker papers are designed for inkjet printing. If you want to use a laser printer, make sure the sticker paper is labeled as laser-compatible, otherwise the heat could damage your printer. For best results, use high-quality settings on your inkjet and allow the sheets to dry before cutting.
What’s the best sticker paper for Cricut?
Cricut’s own Printable Sticker Paper is a reliable choice, but many crafters prefer third-party options for better variety and finish. Popular choices include Online Labels, Neato, and waterproof vinyl papers available on Amazon. Matte paper works well for planner stickers, glossy and holographic papers give designs extra shine, and waterproof vinyl is perfect for water bottles or outdoor items. Choose the finish that best suits your project needs.
Can I waterproof my stickers?
Yes! The easiest way is to apply a clear laminating sheet over your sticker sheet before cutting. This protects against moisture, scratches, and fading. Another option is using waterproof vinyl sticker paper, which is designed to hold up on items like tumblers or laptops. Some crafters also use spray sealants to lock in ink before laminating. While these methods make stickers water-resistant, hand washing is still recommended for the longest life.
Do I need Cricut Access to make stickers?
No, Cricut Access isn’t required. You can upload your own images, buy sticker graphics elsewhere, or design from scratch in Design Space. However, Cricut Access gives you a large library of ready-to-use images, fonts, and projects, which can save time if you don’t want to design everything yourself. It’s optional, but handy if you make stickers often.
Can I sell stickers made with Cricut?
Yes! Many small businesses use Cricut to create stickers for Etsy shops, local markets, and online stores. Stickers are affordable to make, easy to ship, and always in demand. The main thing to remember is to use artwork you own or that comes with a commercial license. Free graphics often come with personal-use-only restrictions, so always check before selling your designs.
Why aren’t my Cricut stickers cutting correctly?
If your stickers aren’t cutting right, first calibrate the Print Then Cut feature in Design Space. Also, make sure your mat is loaded straight, the blade is sharp, and your printer is set to the correct paper size. Sticker paper that’s too thick can cause issues — in that case, adjust your cut settings or try a thinner paper. Always do a test cut before committing to a full sheet.
Can Cricut cut clear stickers?
Yes, Cricut can cut clear sticker paper and printable vinyl, but it can be tricky because the sensors sometimes struggle to read registration marks on transparent material. To fix this, you can add a white background or border behind the clear paper, which makes it easier for the machine to scan. Once cut, clear stickers look professional and work beautifully on laptops, glass, packaging, and more.
Final Thoughts
Learning how to make stickers with Cricut is one of the most rewarding and fun projects you can try as a crafter. Whether you want cute planner stickers, personalized gifts, or products for your small business, Cricut makes the process simple and professional.
Start with high-quality designs, use good sticker paper, and practice with different cut settings until you find your perfect formula. Soon, you’ll be creating custom sticker sheets that rival anything you can buy in stores.
[…] your main goal is to design and sell stickers, planner pages, or custom labels, Silhouette’s machines […]
[…] you’ve ever wondered how to make stickers with your Cricut, this step-by-step sticker making tutorial will show you exactly what to do — from designing and […]
[…] Stickers for planners, journals, or scrapbooking […]